<<<1/15/2003 4/7/2003 4/19/2003>>>
*Disclaimer: I will not be responsible for any damage you do by following this procedure*
Here are the rest of the porting pictures and descriptions. This article will cover the entire intake side of the engine from the throttle body to the intake valve.
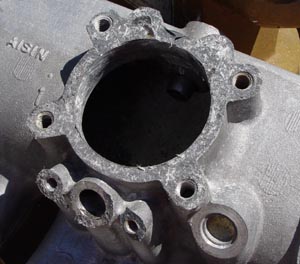
First we will work on the throttle body opening. There is really not much to do here other than smooth things out with a sanding drum. I used the stock gasket that was still stuck on as a guide and there is really no room for improvement here.
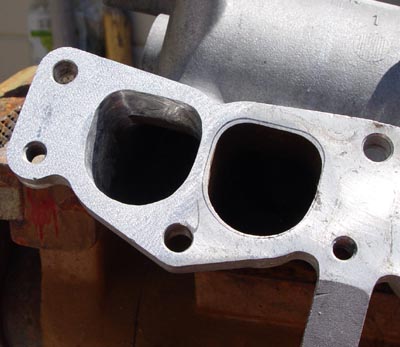
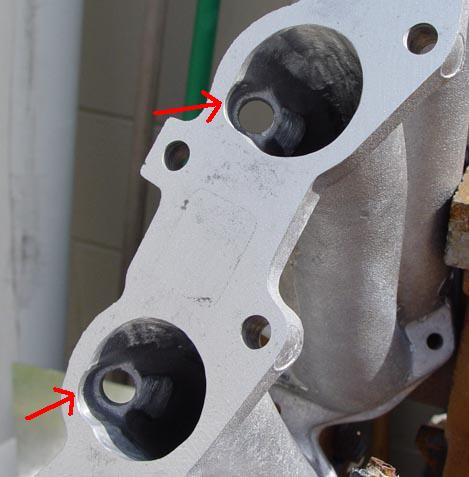
Moving down the next area is the individual runners of the upper intake manifold. These are D-Shaped openings, there is some material here to remove. By gradually smoothing out the openings to match the gasket there should be little turbulence created by this center connection area of the intake manifold. Pay attention when you are buying gaskets. Some kits will have a gasket with O-Shaped port openings that better match the lower part of the intake manifold. Try to get the D-Shaped gasket if you can, it has the larger openings of the two and it is much easier to portmatch the lower openings to the D-Shaped gasket than it will be to add material to the upper ports to make them round. The gaskets I am using are manufactured by ROL, I think the Fel-Pro gaskets are D-Shaped also but check beforehand. The part numbers are ROL MS4034, and Fel-Pro MS91350. Here is a picture with one port that has been marked to match the gasket and another port that has been ported to match the gasket. The next picture is of all the port opening marked and ready to be ported.
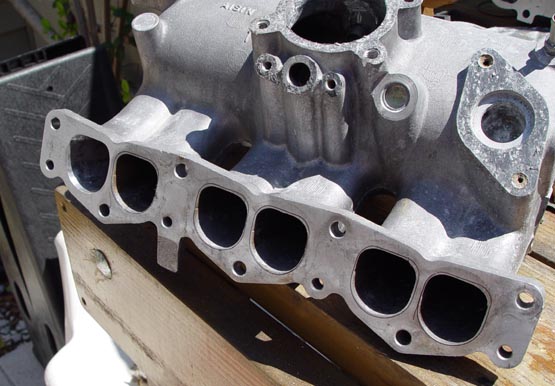
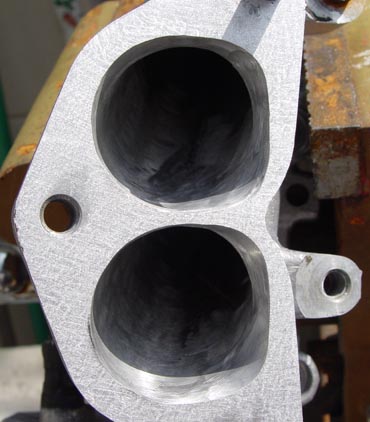
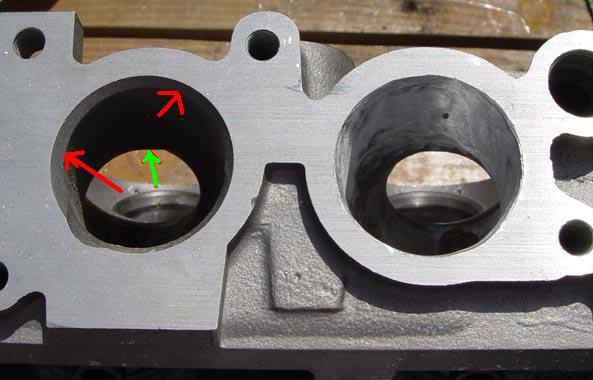
The next section is the outer part of the lower intake manifold. Here you will see the round ports and how having D-Shaped ports bolted to them can cause some turbulence. The pictures will show the areas where material needs to be removed and blended into the intake runner. Remember the goal is not to enlarge the ports as this will slow down the velocity of the air entering the engine. You just want to remove areas of turbulence.

Next are the ports that bolt to the head. There is not much work to do here really just a light cleaning up in some areas and a little work with the sanding drum to smooth things out are about all you need. Pay special attention to the clearancing of the fuel injector releifs. You want to make sure the gas is getting squirted directly at the backside of the valve. The releifs are cut into the gasket as well so just use that as a guide.

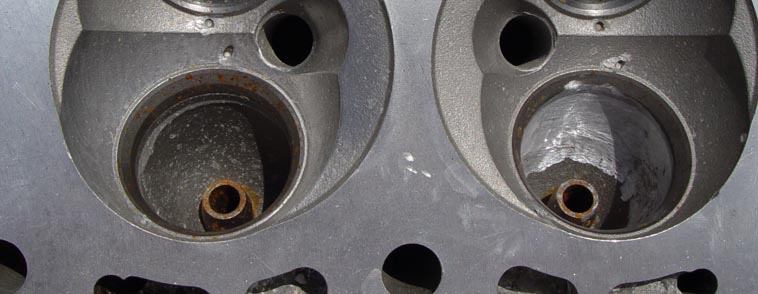
Next are the intake ports of the cylinder head. Not quite as much work here as with the exhaust ports. First is the lip at the opening of the port. There was an angle cast in this at the factory to smooth the transition but i have smoothed the transition even more. The outer edge should match the gasket exactly so there is no need to enlarge these openings any just finish the transition some more.
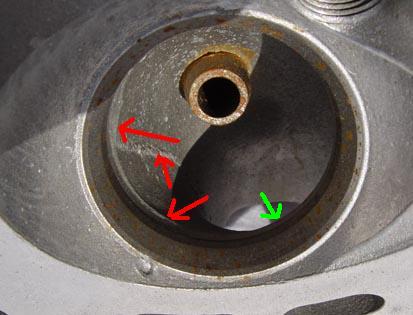
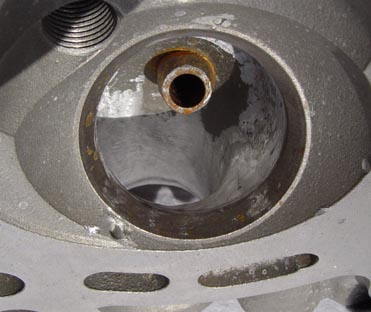
In the valve bowl area there are some more sharp casting marks and a slight edge where the port makes the turn down which can be seen better in the picture above where I have marked with the green arrow. I smoothed this out a little, the area can also be seen in the picture below.
Created by Wesley Hetrick 4/7/2003