Upgrading Stereo Sound For MK2 Supra's and Celica Lift back
Part One-Installing the Receiver/Head-unit
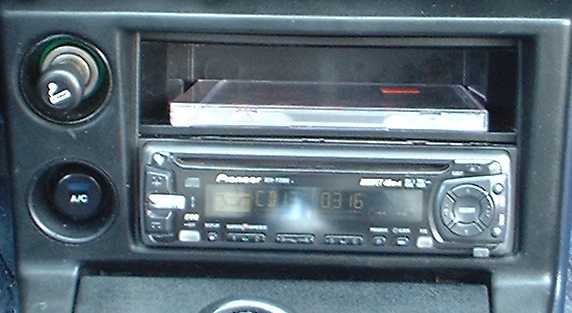
The stock Toyota sound system that came with these cars was pretty good for its time, however age and technological advancements have made them less than pleasant to listen to now. My goal was to make the sound system perform to my liking while not costing an arm and a leg. I first chose to upgrade the stock head unit with a Pioneer DEH P-2000 CD player and receiver. This is a very low cost deck that offers many features such as a user adjustable equalizer, RCA outputs for connecting amplifiers, IP bus control for controlling external units such as CD changers, or the new to the market Satellite Radio. This head unit is actually 3 years old now and will probably be hard to find, the current model equivalent is the DEH P-2300 and retails for around $150. Before you even attempt to hook a new head unit up make sure you have a wiring harness adapter which should be available at the same place you bought the deck, the price for these is between 5 and 15 dollars. There are 2 companies that are currently producing these that I know of.
The first one is Scosche and can be found at Wal-Mart, the part number for this one is TA01, It is not stocked by either of my local stores so it will have to be special ordered most likely. There should be a catalog of special order items hanging from the car stereo and speaker display. The second is made by Metra, part number 70-1398, this one should be easier to find as it seems to be the standard for all the car stereo installers. Once you have these items, I would also recommend having some wire crimpers and splicing connectors if you don't have some at home already. Now you are ready to install your radio. This is the easy part if you took my suggestions.
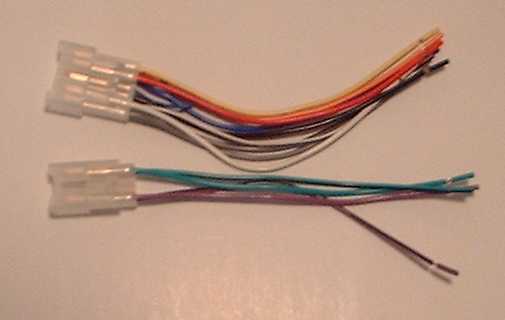
First get a beer or tall glass of iced tea and turn on the TV and relax while you splice the wiring harness that came with the new head unit into the wiring harness adaptor that you bought, the colors will match since the wiring harness and the stereo manufacturer will be following the same standard's most likely, but they are both well marked just to double check things. And that's pretty much it, if there is a lot of excess wire you can zip-tie the extra back on top of itself you will only need about 6 inches. Now just plug the Toyota plug into the Toyota plug and the stereo plug into the stereo and the antenna plug into its spot and you're all done, no trying to figure out what color is what, no mysterious electrical fires, crystal clear sound all the time, and to think they charge around $75 dollars to do that and you did it while drinking a beer in front of the TV. for the most part!!!!
Part 2-Replacing the front speakers
I chose to replace the stock front 3" speakers with some Jensen replacement speakers that I bought at Wal-Mart for $25. The R/R process for these is pretty straightforward. The passenger side is the easier of the two with just some Phillips head screws holding the lower section of the dashboard up. Once you have it apart you can unhook the spade connectors from the back of the stock speaker and unscrew the plastic clip that is holding the wire to the speaker magnet. Once that is done the original terminals will slide perfectly onto the terminals of the new speaker. Then just put things back in reverse order. The drivers side is a little trickier as you will need to remove the two plastic panels to the left and right of the steering column to gain access to some 10mm bolts that hold this side of the dashboard in place. Then just replace the same as the drivers side. I also chose to add some bass-blockers which are really just some capacitors that keep powerful bass notes from reaching the tiny 3" speakers and causing damage. I have described the process here for the Supra interior however the Celica is very similar and there are no 10mm bolts that need to be removed just standard Phillips head screws.
Part 3-Replacing and upgrading the design of the rear speakers L/B only
Here is where things start to get custom. The rear speakers were just not to my liking in design so I stole someone else's idea (oldmage) and made a few changes to my liking. The stock speakers are a 5X7 type speaker however you will not find an aftermarket speaker in that size that will fit correctly. I went on a hunch and found that 5 1/4" round speakers will fit just fine in the stock speaker holder. I purchased a pair of 5 1/4 drivers/woofers at a car stereo show. And bought some Jensen flush mount tweeters at Wal-Mart. I then purchased a pair of passive crossovers from Radio Shack model #40-1296A. I also needed to purchase some wiring harness adapters for the rear speaker wiring to avoid having to cut off the original plugs. They look something like this.
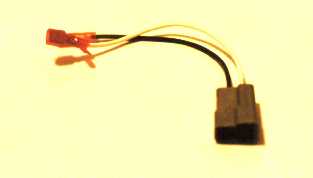
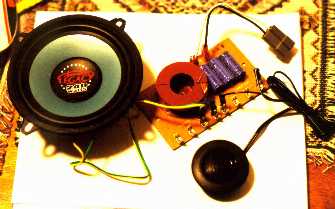
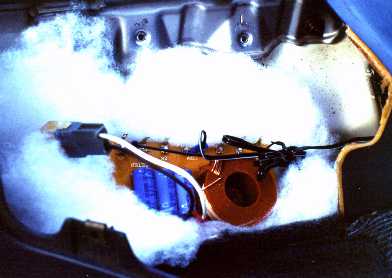
Here is a picture of all the parts connected to each other in the way it will be in the car.
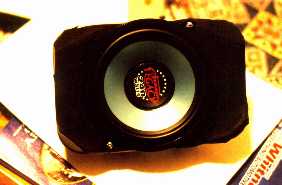
Here is the driver mounted into the stock speaker bracket.
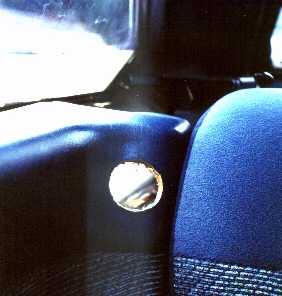
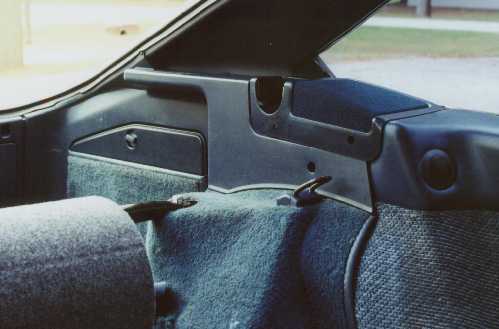
This is where it gets a little hairy. I decided to cut the car in the interest of good sound. I punched a hole into the vinyl section between the rear seats and the side panels like this.
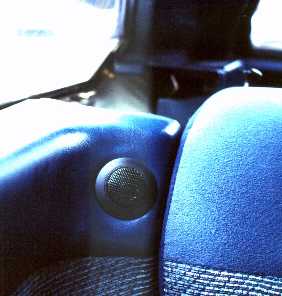
The next step is to install the flush mount tweeters and slide the locking clip onto the backside to keep them firmly in place.
Next line the bottom of the speaker opening with some poly fill. This will protect the electronic crossovers and cancel out some of the metallic sound caused by the cars body. Once this is done attach the harness adapter to the original speaker harness then attach the wires to the input side of the crossover. Next you will need to decide on your crossover point this is the frequency that the sound will be split up and sent to its respective speaker. High frequencies go to the tweeter and low frequencies go to the driver/woofer. It is best to chose a crossover point that is within the manufactures suggested range for both speakers. Connect each speaker to its output terminals on the crossover for the frequency you have selected.
Next install another layer to the top of the crossover and reinstall the speaker bracket with the driver in it.
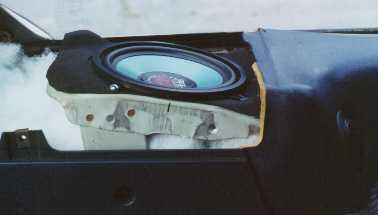
All that's left to do now is put the grille back on and clean up any mess. Then test the system to make sure that sound is coming out of all the speakers. Since the tweeters are aimed right at your head there will be a very noticeable difference in the stereo imaging and volume you will have to adjust your tone control or equalizer to tune the sound to your liking with all the different music styles you listen to.
Part 4-Dual 10" Subwoofer box between strut bar and backseats
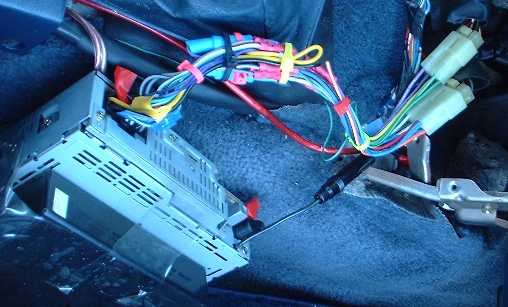
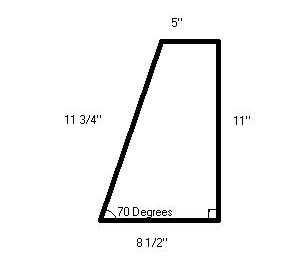
This part was quite a challenge, as you see in the above picture I tried a 6.5" Bazooka style tube for a while. But it just wasn't good enough also the fact that my amplifier was cutting in and out in bridged mode made it where I wanted dual subs again. But the strut bar was right in the way of where things needed to be, and I was really liking the fact that I actually had some trunk space now and that I could access the spare tire without unhooking and moving anything. So I set out to make a box that would fit the small space between the bar and the backseats. I originally intended this box to hold 2 8" speakers but due to budget reasons I decided to reuse the 2 10" speakers that I had already. On the left are the dimensions and angles of the box from a side view. On the right is a picture of the finished box without the cutouts for the speakers or speaker terminals.
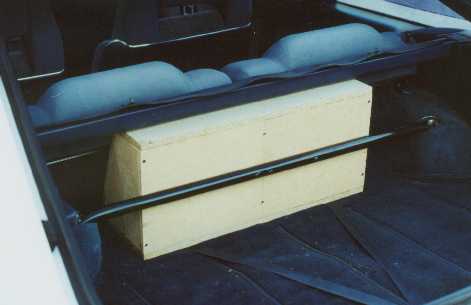
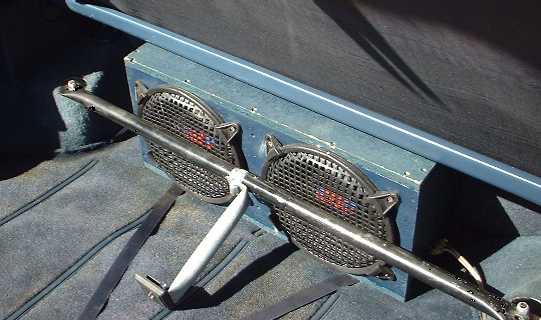
I mounted the speaker terminal plates at the bottom of each end of the box. They are banana style plugs to allow for a good solid connection as well as allowing for easy removal of the box without any tools. The box is 24" long. I used unlaminated medium density fiberboard (MDF) from the shelving department of my local home improvement store. It took 3 Four foot boards to complete the box, they were $2.50 each. Plus a little wood glue for all the seams and some drywall screws made the box cost under $10. Note that there is also a board on the inside dividing up the 2 halves of the box, also it adds strength. I had to move the mounting holes of my strut bar to accommodate the speaker grilles but there appears to be no ill effects from doing this.
Part 5 Amplifier Installation
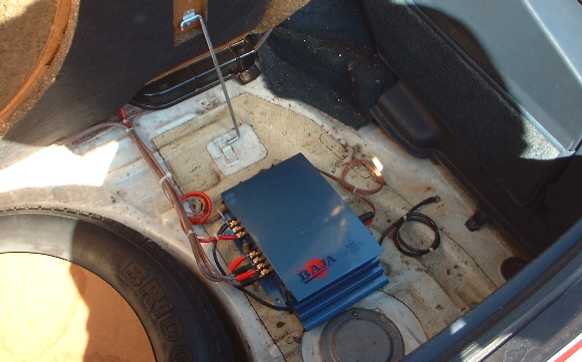
I ran a 10 gauge power wire, a stereo power on wire, and a pair of RCA cables underneath the center console then continued under the carpet, under the rear seats and out under the shelf in the hatch area. The power wire is fused up near where it connects to the battery, and it runs through a rubber grommet in the firewall to keep it from shorting out. I mounted the amp under the shelf using a sheet of Velcro. It is probably not a good idea to mount an amp under here using screws since the gas tank is very close to the sheet metal here and it would be very easy to puncture the gas tank. I never take the amp itself off when I autocross and it has never moved even a little under hard cornering acceleration and braking, so the Velcro seems to be capable of securely mounting the amp. Attach all the wires in the respective places on the amp, add on a heavy duty ground cable and attach this securely to the body, run your speaker wires to their respective locations then neatly secure all the wiring using wire ties. Close everything up, pop in your favorite CD and enjoy!
This page created by Wes Hetrick 12/11/2001
Updated 1/26/2003 Back to Supra