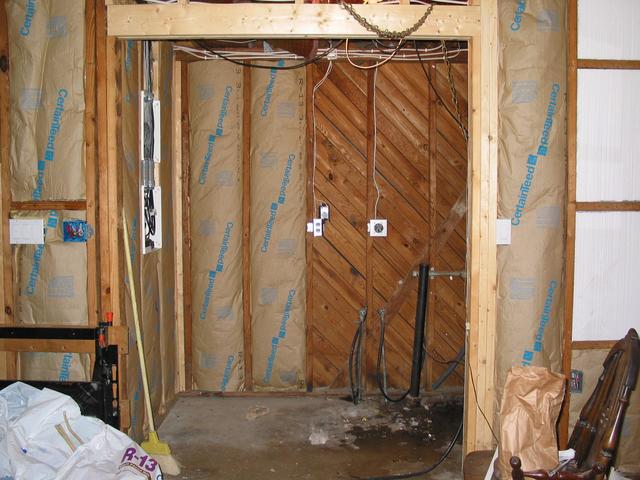
 First thing to be done is get the washer and dryer out of the way. While
waiting for the old water heater to drain, why not let's start stapling up
some insulations?
First thing to be done is get the washer and dryer out of the way. While
waiting for the old water heater to drain, why not let's start stapling up
some insulations?
As part of The Renovation that Ate My Life I decided to get the laundry room done over Labor Day weekend. This involved pulling everything out, putting up sheetrock and putting down floor tile, installing a new water heater, and swapping the washer and dryer around.
Setting aside the washer and dryer for the moment, let's take a look at the water heater replacement. It was an epic, weekend long struggle, filled with drama and conflict. Well, all right, not really. The only drama was when Sue's dad almost got buried under a stack of drywall. That and the problems with various drain valves. But read on and you will understand...
First thing to be done is get the washer and dryer out of the way. While
waiting for the old water heater to drain, why not let's start stapling up
some insulations?
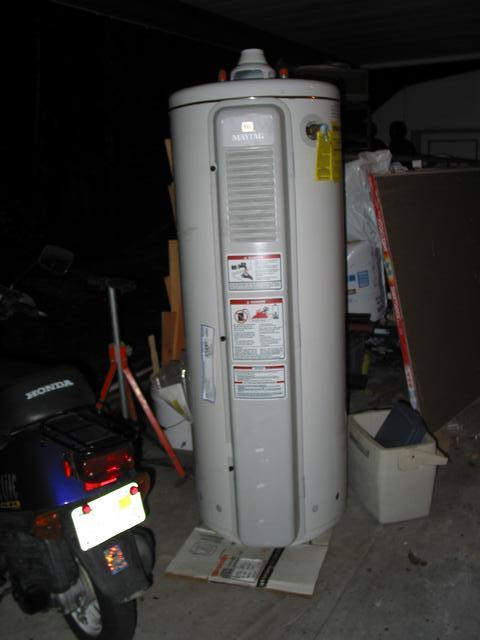
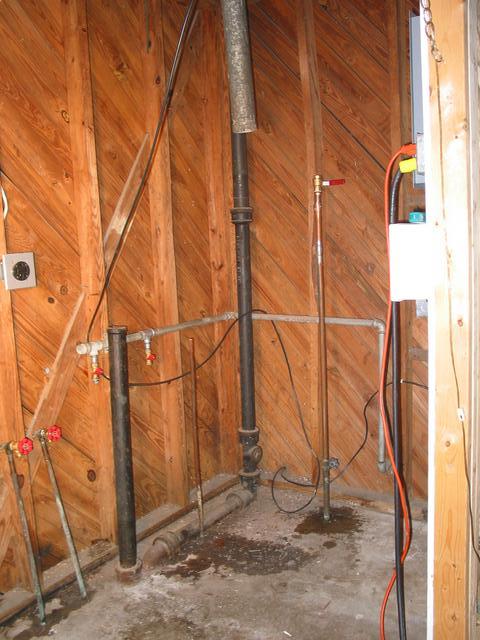
 There's the decrepit old thing now, waiting to be taken out and tossed. We
were soon to discover that the drain valve was clogged, meaning we had to
move 300lb. of water. Nuts.
There's the decrepit old thing now, waiting to be taken out and tossed. We
were soon to discover that the drain valve was clogged, meaning we had to
move 300lb. of water. Nuts.
 And here's the shiny new 50 gallon water heater. It weighs about 130lb.,
most of it insulation. This is supposed to be the last word in efficiency.
It'll heat more water using less gas than the old one. We hope. Anyhow, it
was on sale for $100.00 off at Lowe's, so I scarfed it up.
And here's the shiny new 50 gallon water heater. It weighs about 130lb.,
most of it insulation. This is supposed to be the last word in efficiency.
It'll heat more water using less gas than the old one. We hope. Anyhow, it
was on sale for $100.00 off at Lowe's, so I scarfed it up.
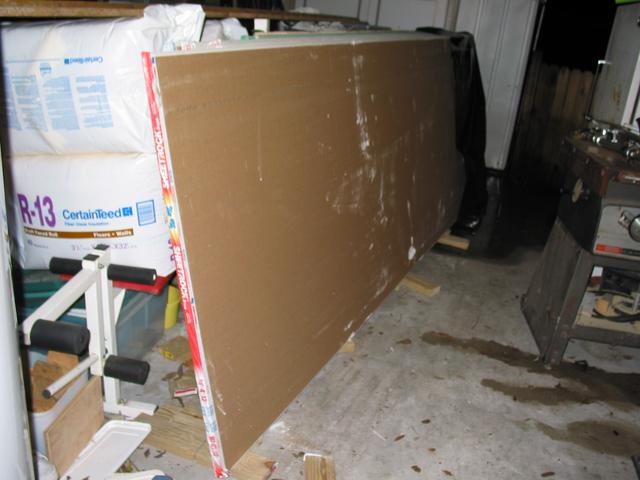 Naturally, when Contractor's Supply delivered the drywall, they stacked the
green water resistant stuff (which we need to use in the laundry room)
behind the 4x12s of regular grey stuff. Ray kindly held the stack of
grey boards off the green while I hauled the green out front where it should
have been. In the process he nearly lost control of the stack. That would
have been bad, I think.
Naturally, when Contractor's Supply delivered the drywall, they stacked the
green water resistant stuff (which we need to use in the laundry room)
behind the 4x12s of regular grey stuff. Ray kindly held the stack of
grey boards off the green while I hauled the green out front where it should
have been. In the process he nearly lost control of the stack. That would
have been bad, I think.
 Ray takes a well earned rest from supporting several times his body weight
in sheetrock! You know, most guys don't appreciate their father in law
nearly enough. Thanks Ray!
Ray takes a well earned rest from supporting several times his body weight
in sheetrock! You know, most guys don't appreciate their father in law
nearly enough. Thanks Ray!
 Finally got the old heater out. It was no fun whatsoever, given the
clogged drain valve. That's why I decided to heed the Fine Homebuilding
article and replace the new heater's drain valve with a 3/4" ball valve
that's big enough to pass a marble. It'll be far less likely to clog up,
and it'll make flushing the tank every year or so much less of a hassle.
Note the extra gas valve, for when we decide to get an energy-efficient gas
dryer. Always think ahead!
Finally got the old heater out. It was no fun whatsoever, given the
clogged drain valve. That's why I decided to heed the Fine Homebuilding
article and replace the new heater's drain valve with a 3/4" ball valve
that's big enough to pass a marble. It'll be far less likely to clog up,
and it'll make flushing the tank every year or so much less of a hassle.
Note the extra gas valve, for when we decide to get an energy-efficient gas
dryer. Always think ahead!
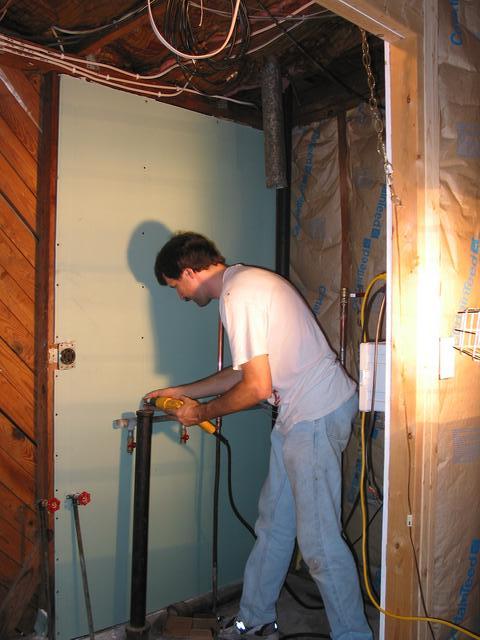 Yes, I do know which end of the drill is which. Here's your humble
webmaster hanging drywall. Photographic proof that I can do more
than just write pithy prose about this stuff! At this point we start coming
under some time pressure, so...
Yes, I do know which end of the drill is which. Here's your humble
webmaster hanging drywall. Photographic proof that I can do more
than just write pithy prose about this stuff! At this point we start coming
under some time pressure, so...
 ... only enough drywall gets hung to let us put the new water heater in.
After all, Ray's got to head back south that evening.
... only enough drywall gets hung to let us put the new water heater in.
After all, Ray's got to head back south that evening.
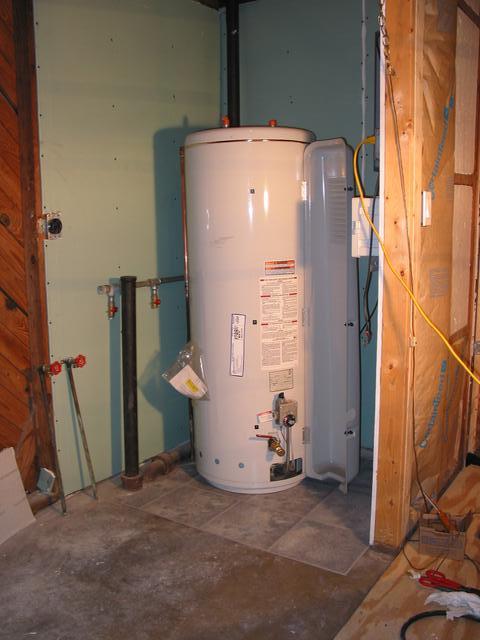 Stick down some floor tiles, grunt and groan a lot, and the new heater's in
place. Note the handsome, manly drain valve (mentioned above). More on
that later. Time to hook up some gas and water and get to heating water!
Stick down some floor tiles, grunt and groan a lot, and the new heater's in
place. Note the handsome, manly drain valve (mentioned above). More on
that later. Time to hook up some gas and water and get to heating water!
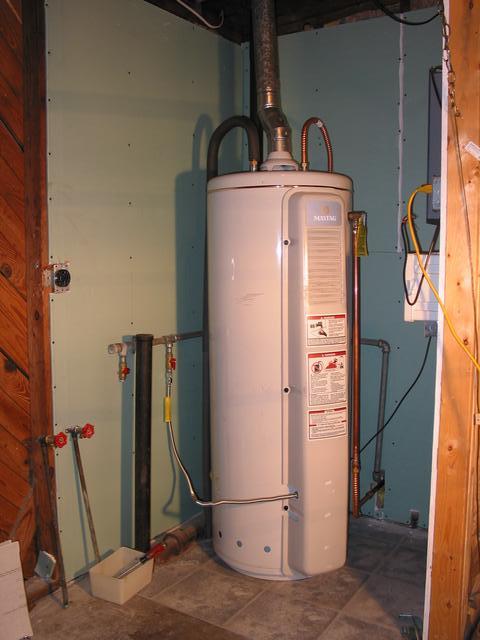 There we are, all hooked up. Had to twist that drain valve around. It was
insufficiently tightened, and started leaking. Another half turn or so
seemed to do the trick. Actually, the leak started up again. Groan.
Drain the tank. Redo the pipe-joint compound on the pipe nipple. Put it
all back together. Refill the tank. Heat it up again. Wait. Hmm... no
drips. Cool; it's fixed!
There we are, all hooked up. Had to twist that drain valve around. It was
insufficiently tightened, and started leaking. Another half turn or so
seemed to do the trick. Actually, the leak started up again. Groan.
Drain the tank. Redo the pipe-joint compound on the pipe nipple. Put it
all back together. Refill the tank. Heat it up again. Wait. Hmm... no
drips. Cool; it's fixed!
Not!
 Take a good close look at that valve. This is the second one of
these guys. Seems that during the reassembly mentioned above the threads on
the pipe nipple, the valve or both got munged, producing a steady 2 or 3
drips per second. Groan. Drain the heater, again. Pull and replace
the pipe nipple and ball valve. This time, notice the instructions in the
Fine Homebuilding article:
Take a good close look at that valve. This is the second one of
these guys. Seems that during the reassembly mentioned above the threads on
the pipe nipple, the valve or both got munged, producing a steady 2 or 3
drips per second. Groan. Drain the heater, again. Pull and replace
the pipe nipple and ball valve. This time, notice the instructions in the
Fine Homebuilding article:
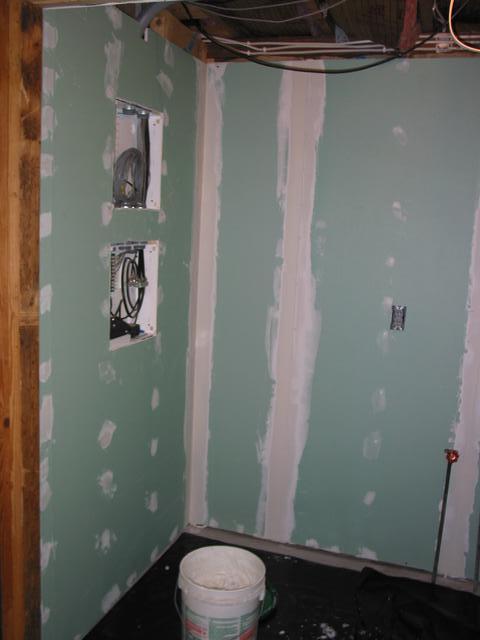 Now that the water heater is done, it's time to finish the drywall. Cutting
the openings for the network cabinets was a bit dicey, as I was terrified
that the holes would weaken the sheet and I'd bust it hauling it into place.
Made it ok, though. Now for the mud job. Aw, nuts! It's something
of a pain trying to mud those joints behind the water heater.
Remember earlier I said, "Always plan ahead"? Well, do as I say, not as I
do!
Now that the water heater is done, it's time to finish the drywall. Cutting
the openings for the network cabinets was a bit dicey, as I was terrified
that the holes would weaken the sheet and I'd bust it hauling it into place.
Made it ok, though. Now for the mud job. Aw, nuts! It's something
of a pain trying to mud those joints behind the water heater.
Remember earlier I said, "Always plan ahead"? Well, do as I say, not as I
do!
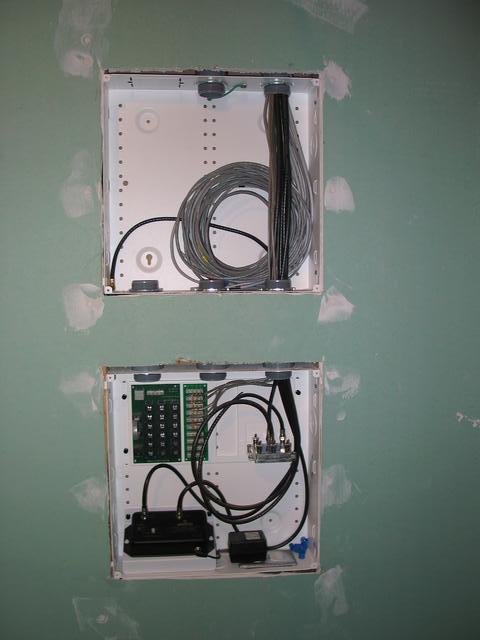 Just 'cause I'm a geek I had to include a closeup of the spiffy Leviton
in-wall network boxes. The top box will hold the CAT5 runs and one of those
ittybitty little Netgear 8 port switches; the bottom box has phone and TV
cable. The black box is a cable amplifier, which sits between the monster
outside antenna and the stereo; Cox doesn't provide FM on its cable so I
just moved the antenna to the stereo when we got cable. I can get FM
stations all the heck over the place. It's wonderful.
Just 'cause I'm a geek I had to include a closeup of the spiffy Leviton
in-wall network boxes. The top box will hold the CAT5 runs and one of those
ittybitty little Netgear 8 port switches; the bottom box has phone and TV
cable. The black box is a cable amplifier, which sits between the monster
outside antenna and the stereo; Cox doesn't provide FM on its cable so I
just moved the antenna to the stereo when we got cable. I can get FM
stations all the heck over the place. It's wonderful.