
The Simulation of Radiosity In Bryce 4 & 5
by Nak Muay (Muaythaiboxer@aol.com)
1) All buttons used in this tutorial will be listed in quotes "Like this".
2) All menu items used in this tutorial will be listed as follows, If I wanted you to do a save, I would show it as follows, "File>Save".
Radiosity is essentially a representation of real world lighting. Though we cannot come even close to it in Bryce we can certainly try.
Launch Bryce. Open the scene in which you would like to simulate radiosity. Mine is shown below:
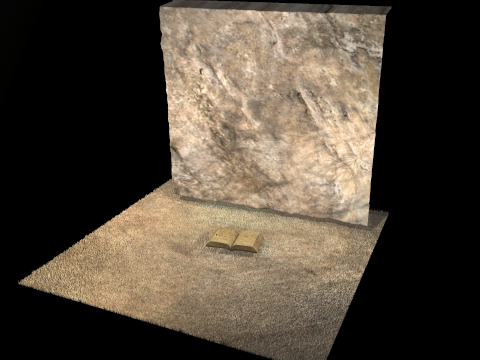
The lighting in this picture is okay, but we want it better. It's too bright in some areas. This is the default black sky with haze disengaged.
In Bryce, it is best to use radial lights to simulate radiosity. 3 to 4 placed around an object at a decent distance will cancel out hard shadows and provide a beautiful display (play with the intensity to get the best effect for your scene). Well you say, what if I want shadows? You still need to place virtual lights for your light sources. These will cast your shadows.
Notice the placement of the lights. I used four this time. They are distant from all objects to give it a softer effect. You don't want a big bright spot on one part of a model. Experiment. Sometimes it is necessary to add a few more radials (but don't get them too close!).

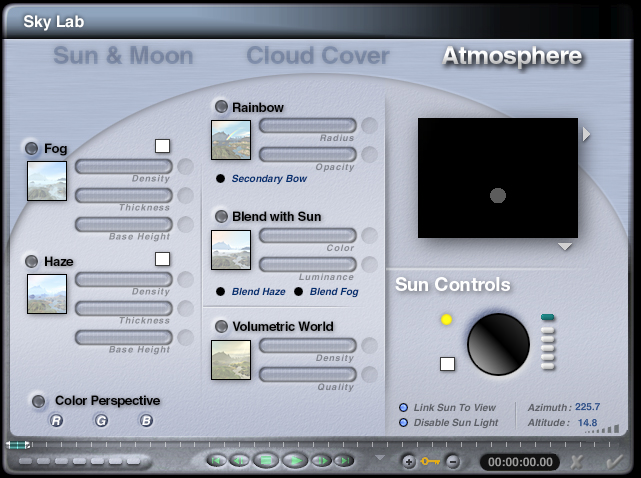
Don't forget to turn the sun off. You can do this by clicking "Sky & Fog" then the "Cloud" button located next to the virtual sun/moon. You will see the screen below. The button to disable sunlight is located in the lower right corner.
This is the final render with the radial lights in place. Compare the original to this one and you will see the difference just because of the lighting! The radial lights give the textures more of their original color.
![]()